
Getting Started
Installation
- Turn on your device and connect it to the Internet.
- Connect the device to the USB port of a computer using a USB cable (to access the Type A port, remove the device back cover).
- Download the 3DiVi Telpo Face Recognition application and place it to any directory on your device.
- Install the application. To do this, click on the app icon and then click Install in a pop-up window. Wait for installation to complete and click Done.
- Run the application. Click on the lock icon in the lower right corner of the app interface to go to the app settings.
- Enter the PIN (default PIN is 1111).
- Go to the Configuration section in the app Settings (see Fig. 1).
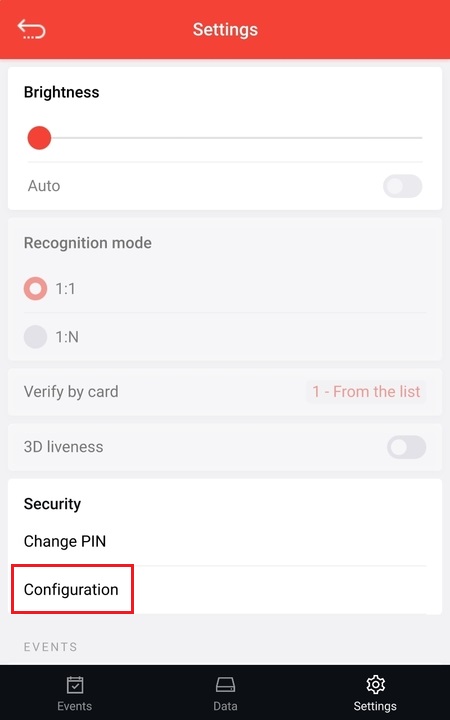 Figure 1. The Configuration section in the app settings.
Activation
- After you go to the Configuration section, the authorization page will open in the browser. Enter the Edge device token on this page. To copy the Edge device token:
- Go to the Face Machine Server management interface
- Go to the Edge devices tab > (Edge device name) and find the Activation Info section
- Copy the Edge device token from the Activation Info section
Note: See the detailed information about the activation of Edge devices in the Face Machine Client – Getting Started section.
- Then click the Activate button (see Fig. 2) in the web interface of the application. After successful activation, the application will automatically restart.
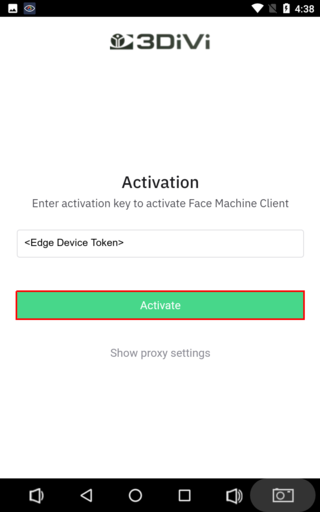 Figure 2. The field for entering the Edge device token and activation button on the authorization page
Note: If necessary, you can configure a proxy server. To do this, click Show proxy settings on the authorization page and enter the data.
Settings
- To open the configuration interface of 3DiVi Telpo Face Recognition, go to the app settings (see the lock icon in the lower-right corner) and click Configuration.
- To enable the Depth Liveness function, tick Depth/Liveness in the Cameras settings section (see Fig. 3).
- If necessary, you can activate the following options:
- Anonymous face identification mode (face images from events are not saved and not sent to the server) – Enable anonymous events mode
- Gender and age recognition
- Emotion recognition To activate the option, check the box next to it.
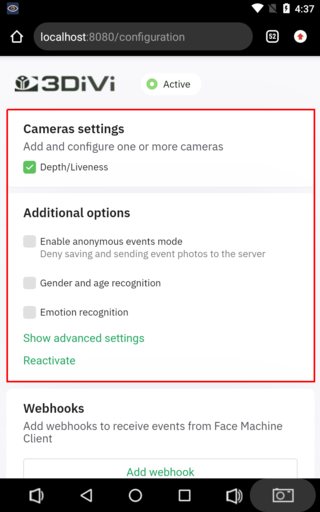 Figure 3. Advanced settings menu in 3DiVi Telpo Face Recognition
Exclusive mode
In order to restrict user interaction with the Android interface of the device, you can enable the exclusive mode of the app:
- Go to the security settings of your device: Settings > Security.
- Click Screen Lock (see Fig. 4).
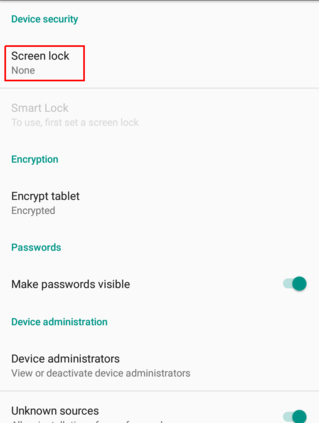 Figure 4. Configuring the screen lock of the device
- Then, click PIN (see Fig. 5).
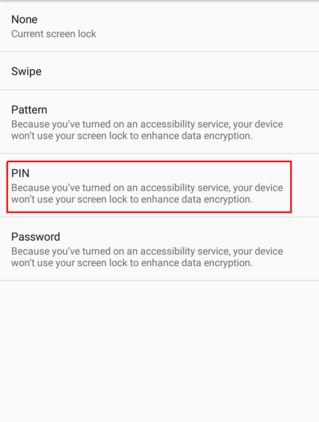 Figure 5. Setting up the device PIN
- Click Required PIN to start device, set the PIN and click Continue. Confirm the entered PIN and click Continue.
- After that, you'll see a notification. Choose the way to display notifications on a locked screen of your device. You can leave the default option Don't show notifications at all (see Fig. 6) or choose any other available option.
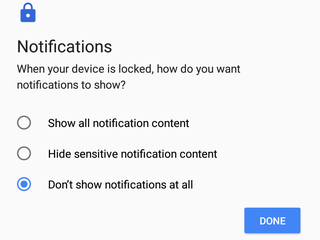 Figure 6. Notification settings menu on the device
Note: A PIN is set for all functions of the device that require entering a PIN (for example, turning the device on and off).
- Return to the Security section (see Step 1).
- Click Screen pinning in the Advanced section (see Fig. 7).
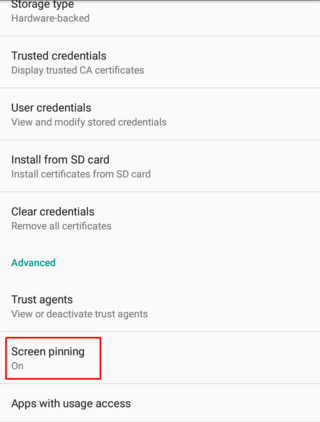 Figure 7. Screen lock settings on the device
- Check the box. The status will change to On.
- Run the 3DiVi Telpo Face Recognition application.
- Open the menu of running apps.
- Click the pin icon in the bottom-right corner of the running app (see Fig. 8).
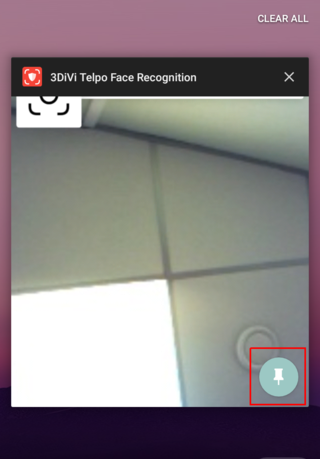 Figure 8. Lock screen button in 3DiVi Telpo Face Recognition
- As a result, you'll see the camera preview and notification Screen is pinned with the instructions on how to unlock the screen. Read the instructions and click Got it. After that, the instructions will be hidden and a preview from the camera will be displayed.